Portfolio #6: Golden Skies
New image, 2000x1600, 72 ppi.
Use the Gradient tool, from light yellow to orange.
Make the gradient radial, in a circle. Fill the background with it.
Then use Curves on the background, increasing the contrast.
Create a brush (actually the exact same brush I made last portfolio) by doing the following steps:
1. Select the normal circular brush.
2. Click on the icon which should be somewhere near the top right that looks like a jar of paintbrushes. If it's not there, press F5 or go to Window>Brushes. You should see a window pop up.
3. Click on the Shape Dynamics tab.
4. Change the Size Jitter to 50%.
5. Change the Angle Jitter to 100%.
6. Change the Roundness Jitter to 50%.
7. Change the Minimum Roundness to 25%.
8. Click on Brush Tip Shape.
9. Change Hardness to 10%.
10. Change Spacing to 100%.
11. Change Diameter to 60 px.
12. Click on the Scattering tab.
13. Change Scattering to 150%.
14. Change Count to 10.
15. Change Count Jitter to 100%.
16. Click on the Texture tab.
17. Choose the texture called Clouds..
18. Check the box that says Texture Each Tip.
19. Change the Mode to Color Burn.
20. Change the Depth to 50%.
21. Change the Minimum Depth to 100%.
22. Change the Depth Jitter to 100%.
23. Change the Scale to 150%.
24. Close the window.
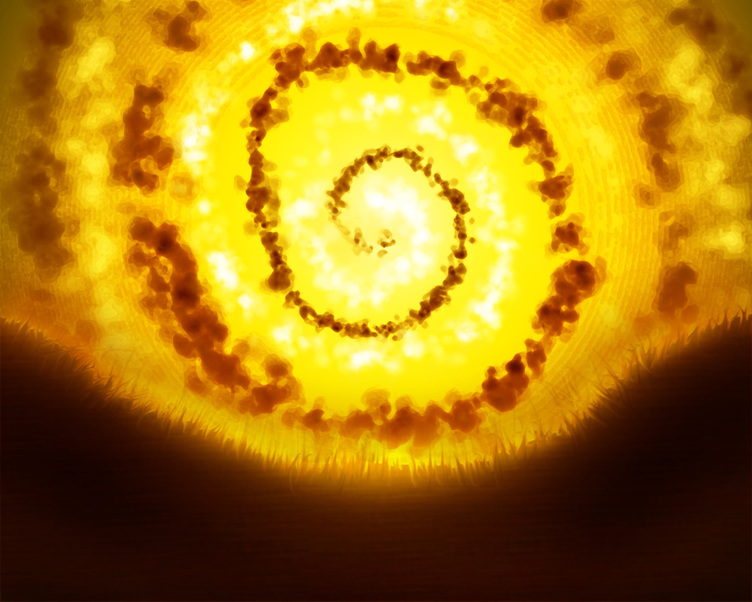
Change your foreground color to brownish-orange, and make a new layer. Use the Pen tool to make a spiral shape around the center of the gradient. Right-click on that path with the Pen tool and click Stroke Path. Wait for it to load. The brush you made will be all along the spiral path.
Now change your foreground color to yellowish-orange and do the same thing again. Now change your foreground color to white and do the same thing again with a smaller spiral.
Merge those four layers together using Merge Visible.
Duplicate the layer, apply the Fresco filter, and set the blending mode to Overlay.
By now, it should look kind of like a cinnamon roll.
Go to the original layer.
There's a bit too much red around the edges; we want a golden effect.
Go to Image>Adjustments>Hue and Saturation. (Not an adjustment layer because this is the only layer we want to change.)
Where it says Master, change it to Red. Set the Hue slider to +50, the Saturation slider to -100, and the Lightness slider to +100. Press OK and close the window.
Now merge the two layers together using Merge Visible.
This is supposed to be a landscape. Let's add the land part.
Make a new layer. Using the brush tool (color does not matter), create what looks like a flatland surrounded by hills on either side, near the bottom of the image. Keep the center of the spiral exposed. On the new layer, go to Layer Styles. Add a Color Overlay of yellowish-orange, blend mode Color. Add a Pattern Overlay, blend mode Luminosity, of any pattern you want. Also add an Outer Glow, all default settings and color yellow-orange.
Create a new blank layer under that layer and merge the two together, removing all effects. Then go to Image>Adjustments>Hue/Saturation. Change Hue to -22, Saturation to 100, and lightness to -50. Then apply a Gaussian Blur with a radius of 5 pixels. Use the Burn and Dodge tools to create shadows and highlights wherever you wish. Try to add highlights on top and shadows near the bottom. Duplicate the layer. Use the Smudge tool to slightly extend out portions of the land towards the spiral center. Use the Dodge tool to brighten the very top and bottom of the smudged layer. Set the smudged layer's blend mode to Overlay. On the layer below the smudged layer, use the Smudge tool even smaller and larger strength than before to make a grass-like effect. Add a Bevel and Emboss with depth 1000%, size 0 px, soften 0 px, angle 90, altitude 69, highlight color bright yellow, and all the other settings default. That's it.