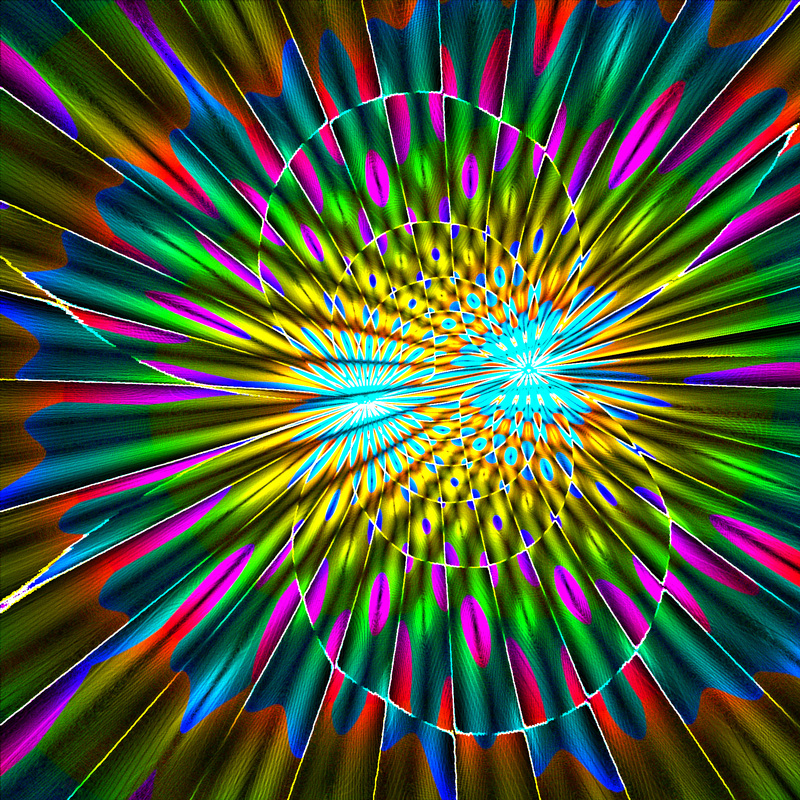
Nine Week Project 1: Color Explosion
New image, 2048x2048
Open the Gradient tool.
Create a gradient that goes from black to white to black to white to black to white to black to white to black to white to black to white to black to white to black to white to black to white to black to white to black to white to black to white to black to white to black to white to black to white to black to white to black to white to black to white to black to white. Well, it doesn't have to be that many blacks and whites (keep it in the range of 20-40), but it has to start on black and end in white. Then make a new layer, and use the Gradient tool - click and drag from somewhere near the middle to somewhere near the edge. Find the one place where there is an abrupt transition from black to white. Mentally extend that line to the right (or left or up or down or wherever it isn't). Make a new layer and use the gradient tool, clicking from somewhere on that line to the opposite direction, and then dragging from the original radiant along the line in the same opposite direction. Rename the bottom layer pattern 1 and the top layer pattern 2. Duplicate each layer twice. Move the layers around so that, from top to bottom, the order is Pattern 2 Copy 2, Pattern 1 Copy 2, Pattern 2 Copy, Pattern 1 Copy, Pattern 2, Pattern 1.
From top to bottom, the blend modes should be: Soft Light, Exclusion, Exclusion, Hard Mix, Hard Mix, Normal. Merge all the layers together. Change your gradient to black on the left to white on the right. Make two new layers. On the lower layer, make a radial gradient centered on the leftmost center. On the upper layer, make a radial gradient centered on the rightmost center. Set the blend mode of the upper layer to Lighten, merge it down, and do a Gradient Map with a rainbow gradient. Set the layer's blend mode to Color. Merge it down, invert the layer, and do Filter>Stylize>Glowing Edges with default settings. Done!
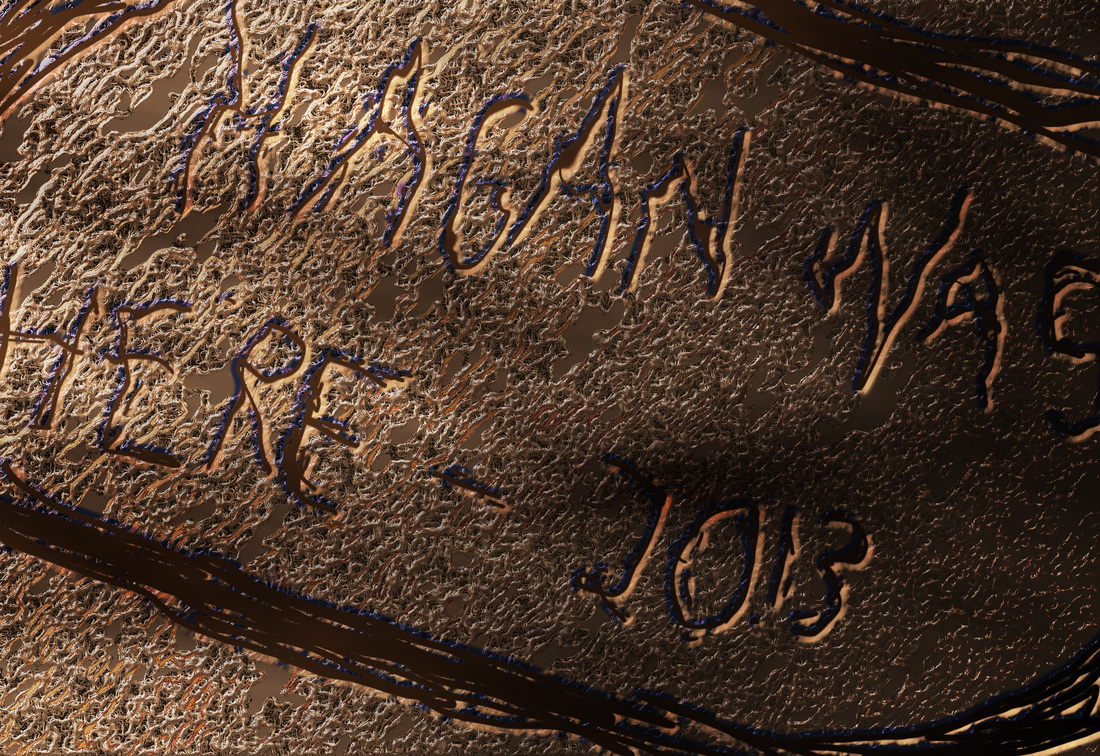
Nine Week Project 2: Wood Carving
New picture, 1600x1100. Click on the small button on the bottom left that looks like a small black square on top of a small white square. Do Render>Clouds. Do Filter>Custom and fill in the numbers like this:
10 ____
_ 10 ___
__ 1 __
___-10_
____-10
1 _
Now do Filter>Stylize>Glowing Edges with Edge Width 1, Edge Brightness 20, and Smoothness 15.
Duplicate the layer, invert it, and do Image>Adjustments>Gradient Map using a rainbow gradient. Set the duplicate layer's blend mode to Color and do Merge Down.
Next do Select>Color Range and click on a light green pixel with the eyedropper. Set Fuzziness to 50. Press OK and do Ctrl-J. Call the new layer Greens. Add a Bevel and Emboss, and a Drop Shadow, both with default settings. Do Image>Adjustments>Hue and Saturation with Hue 114, Saturation 62, and Lightness 15. Turn on Colorize. On the layer Greens, add an outer Glow of blend mode Color Burn, color brown, opacity 75%, technique Precise, spread 0%, size 5 px, range 50%, and jitter 0%. Add a color overlay of brown with the default settings. Add a stroke of size 1 px, position center, blend mode normal, opacity 100%, and color brown. On the background layer, add a color overlay of brown with blend mode Color, a gradient overlay of blend mode subtract, from black on the left to white on the right, with angle -42, and a pattern overlay of any dark-toned pattern you wish with blend mode Overlay. Now do Merge Visible. On the new merged layer, add a gradient overlay from black on the left to white on the right, angle 163, and blend mode overlay. Add a color overlay of blend mode normal, color brown, and opacity 25%.
Create a new layer. Using the brush tool, write a message of some sort (something someone would carve into a tree). Slant it a little. I wrote "Hagan Was Here - 2013." Use the liquify tool to make the letters squiggly and bumpy.
Add a bevel and emboss with style Outer Bevel, technique Smooth, depth 100%, direction up, size 13, soften 0, angle -39, altitude 16, Gloss Contour the S-shape, Highlight mode Lighten, Highlight color beige, highlight opacity 75%, Shadow mode Overlay, opacity 75%, color dark blue. Add any texture you wish. Add a Gradient overlay from brown on the left to black on the right. Now Merge Visible. Duplicate the layer and do Filter>Render>Clouds. Stretch out the clouds somewhat and slant them a bit. Set the layer's blend mode to Overlay. Done!