Portfolio #10: Otherworldly Landscape
I think the word "Landscapes" extends to any "land" whatsoever, right?
New image, 716x716. Do Clouds, with background color white and foreground color black.
Do Image>Adjustments>Curves and make a curve that looks like a V-shape. Duplicate the layer twice and apply a Fresco filter (and do Ctrl-I) for the lower duplicated layer and a Watercolor filter for the upper duplicated layer. Set the blend mode of the upper duplicated layer to Difference and that of the lower duplicated layer to Soft Light. For the lower duplicated layer, apply a gradient map of navy blue to white. Merge all the layers and do Ctrl-I.
Create a new layer and use the Brush tool to make circles of various sizes. Set the Fill to 0% and duplicate the layer. For the lower layer, add a Bevel and Emboss, style Inner Bevel, technique Smooth, depth 211, direction Up, size 7, soften 0, angle -35, use global light off, altitude 26, gloss contour normal, everything else default, and a Color Overlay with color black-blue, blend mode Overlay, and opacity 20%. For the other layer, do an Outer Bevel with default settings, and depth 100 and size 20. Merge all layers together.
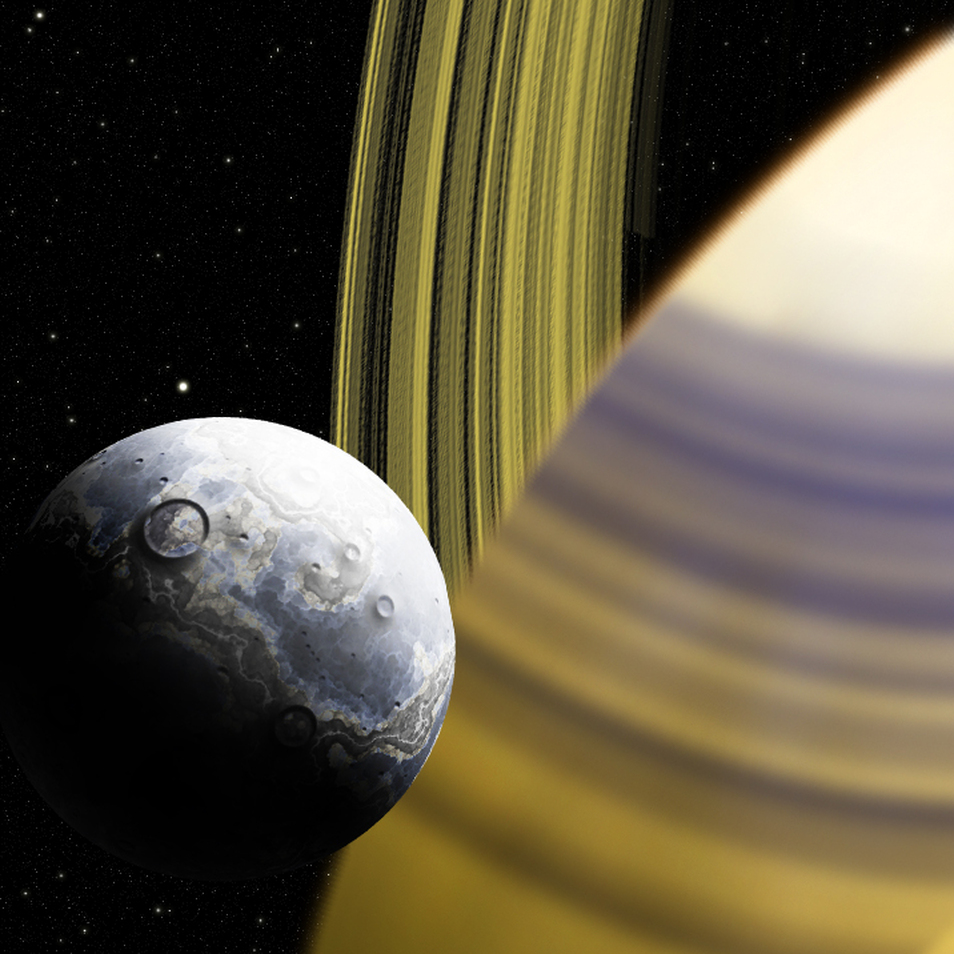
Now do Filter>Spherize, with an amount of 100%. With the Elliptical Marquee tool, click and drag from the bottom right corner to the top left corner EXACTLY. Then do Ctrl-C and Ctrl-V to copy and paste onto a new layer. Delete the original layer. Use Free Transform to shrink the new layer and put it in the bottom left corner. Use the Burn tool to darken the lower left part of the new layer, and use the Burn tool to brighten the very top right part. It should look like a moon or planet of some sort! Make a new layer behind it. Set the brush tool to a VERY big size, as big as it can get, and change the hardness to about 98%. The color should be beige-ish yellow. Use the burn and dodge tools VERY lightly to make a faint shadow near the bottom and a bit of cloud-like texture. Be sure to keep Protect Tones turned off. Duplicate the layer, erase the bottom part of the original layer, and apply an outer glow to the original layer.
Create a background layer filled with whatever color you want. Do Add Noise with monochromatic off and a high intensity, and select a purplish color using Color Range with fuzziness 20. Do Ctrl-C Ctrl-V and delete the original layer filled with noise. Add a color overlay of the color white. Change the opacity of the layer to 30%. Create a new layer and add a few stars manually with the brush tool.
Use the Gradient tool. Change the Gradient Type to Noise, set the R and B sliders to 0, and make a radial gradient from the center to the edge of the picture. Erase the center and the area outside the edges, and free transform it around until you think it looks nice. Put it between the stars and the big yellow planet, and use Hue/Saturation to change it from green to yellow. Duplicate it, move it around a little bit, stretch it out horizontally, set its blend mode to Multiply, apply a Gaussian Blur, put it in front of the yellow planet, and do Ctrl-I.